How to create workflows on Amorphic?
info
- Follow the steps mentioned below.
- Total time taken for this task: 30 Minutes.
- Pre-requisites: User registration is completed, logged in to Amorphic and role switched
Use-case #1: Convert German-language documents to English.
Create a target Dataset
- Click on 'DATASETS' --> 'Datasets' from left navigation-bar.
- Click on ➕ icon at the top right corner.
- Enter the following information and click on 'Register'.
{
  "Dataset Name": "english_language_ds_<your_userid>"
  "Description": "This dataset is a destination for German to English language conversion documents"
  "Domain": "workshop(workshop)"
  "Data Classifications":
  "Keywords": "German", "English"
  "Connection Type": "API(Default)"
  "File Type": "txt"
  "Target Location": "S3"
  "Update Method": "Append"
  "Enable Malware Detection": "No"
  "Enable AI Services": "No"
  "Enable Data Cleanup": "No"
}
Create a workflow
- Click on 'WORKFLOWS' from the left navigation-bar.
- Click on ➕ icon at the top right corner to create a new workflow.
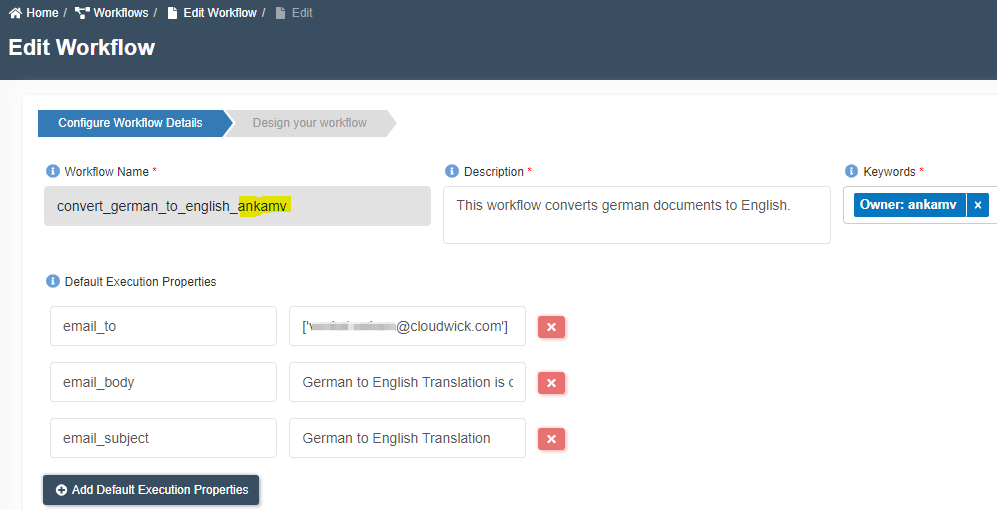
- Enter the following information and click next.
Workflow Name: convert_german_to_english_<your_userid>
Description: This workflow converts German documents to English.
Keywords: German, English
email_to: ['yourmail1@company.com', 'yourmai2@company.com']   <-- Must be a list
email_subject: German to English Translation
email_body: German to English Translation is done. Check the output dataset.
- Drag a
translatenode to the workflow. - Click on edit node using ✏️ icon.
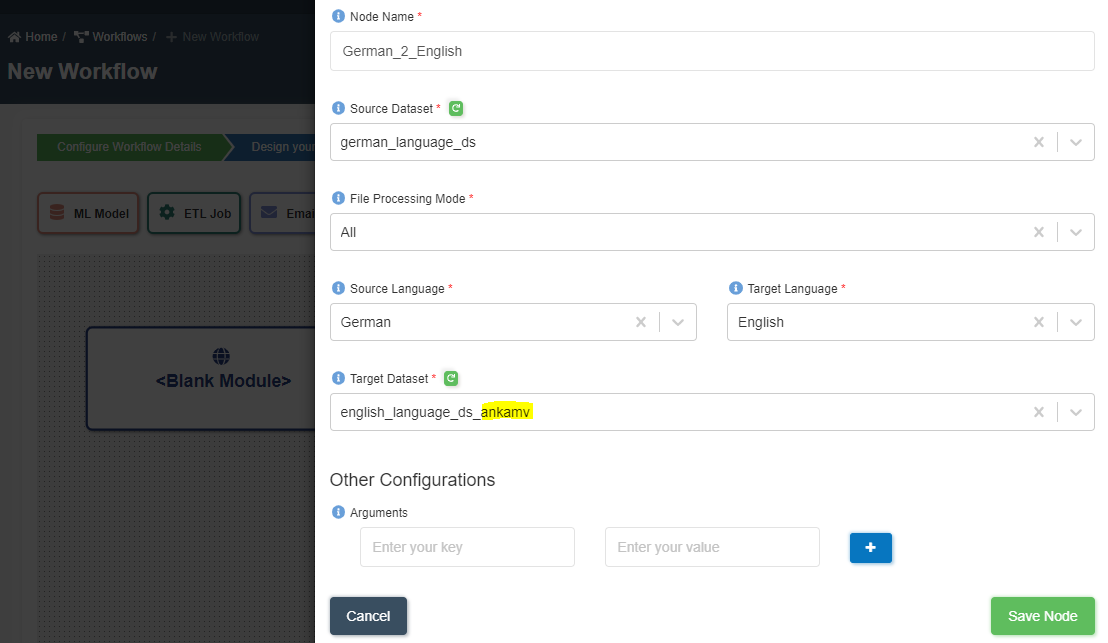
- Enter the following information and click 'save node'.
Node Name: German_2_English
Source Dataset: german_language_ds
File Processing Mode: Changed Data Capture (Only new files will be converted.)
Source Language: German
Taget Language: English
Target Dataset: english_language_ds_<your_userid>
- Drag email node in front of the translate node.
- Click on edit node using ✏️ icon.
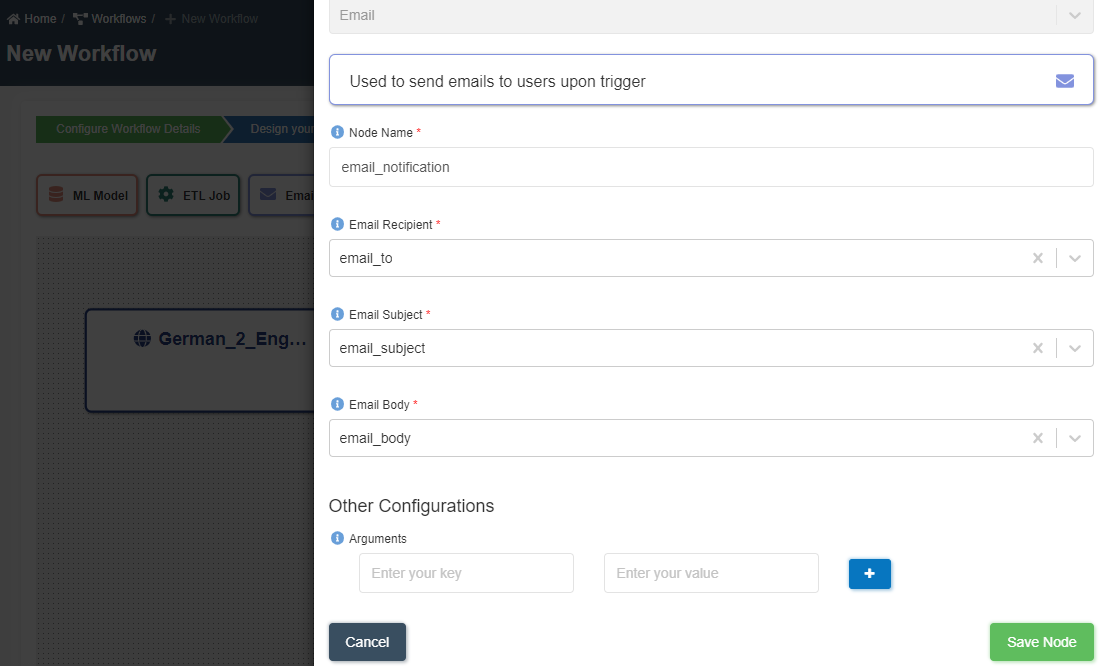
- Enter 'Node name' as 'email_notification'. Choose an appropriate email fileds from drop-down list as shown below. Click 'save node'.
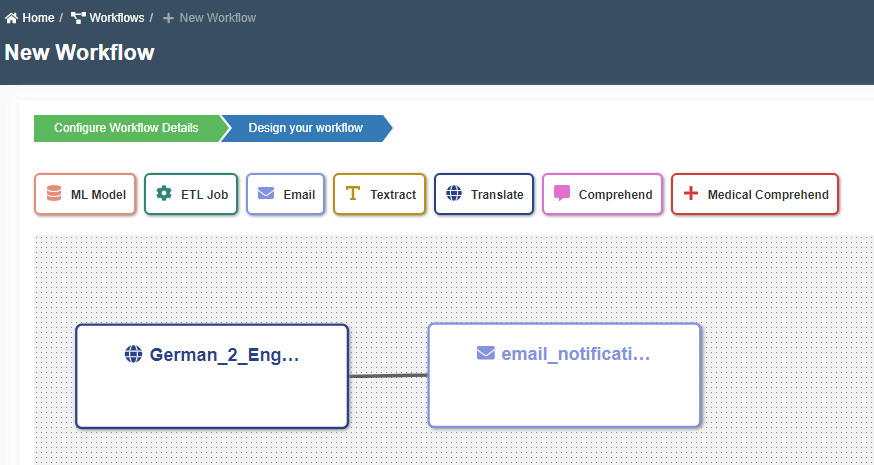
- Connect the two nodes by dragging a line from blue end of translate node to the blue beginning of email node as shown below.
- Click submit. You will get a message "Successfully created workflow".
- Click on 'Run Workflow' ▶️ icon at the top.
- Click on 'Executions' tab.
- Click 🔄 icon to refesh. Status of the workflow will turn from 🟠 to ✔️.
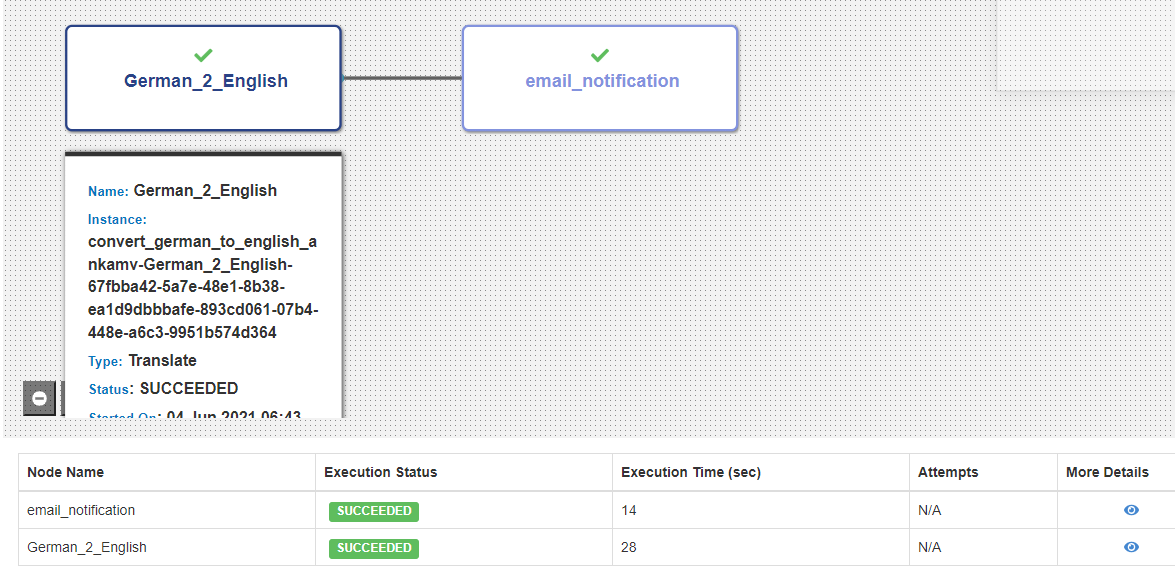
- Once the job is finished, click on 'Execution Details'. It will be similar to the following picture.
- Check the output dataset
english_language_ds_<your_userid> - You should see all files from the source dataset are converted to English.
tip
- You may use your own input dataset and add your own German documents.
- Add this workflow to the scheduler to run it on a schedule, based on the requirement.
- Try other types of nodes.

