How to migrate real-time streaming data to the Amorphic dataset?
info
- Follow the steps mentioned below.
- Total time taken for this task: 30 Minutes.
- Pre-requisites: User registration is completed, logged in to Amorphic and role switched
Create a stream
- Click on 'Streams' widget on the home screen or click on
INGESTION-->Streamson the left side navigation-bar or you may also click onNavigatoron top right corner and search forStreams. - Click on a ➕ icon at the top right corner.
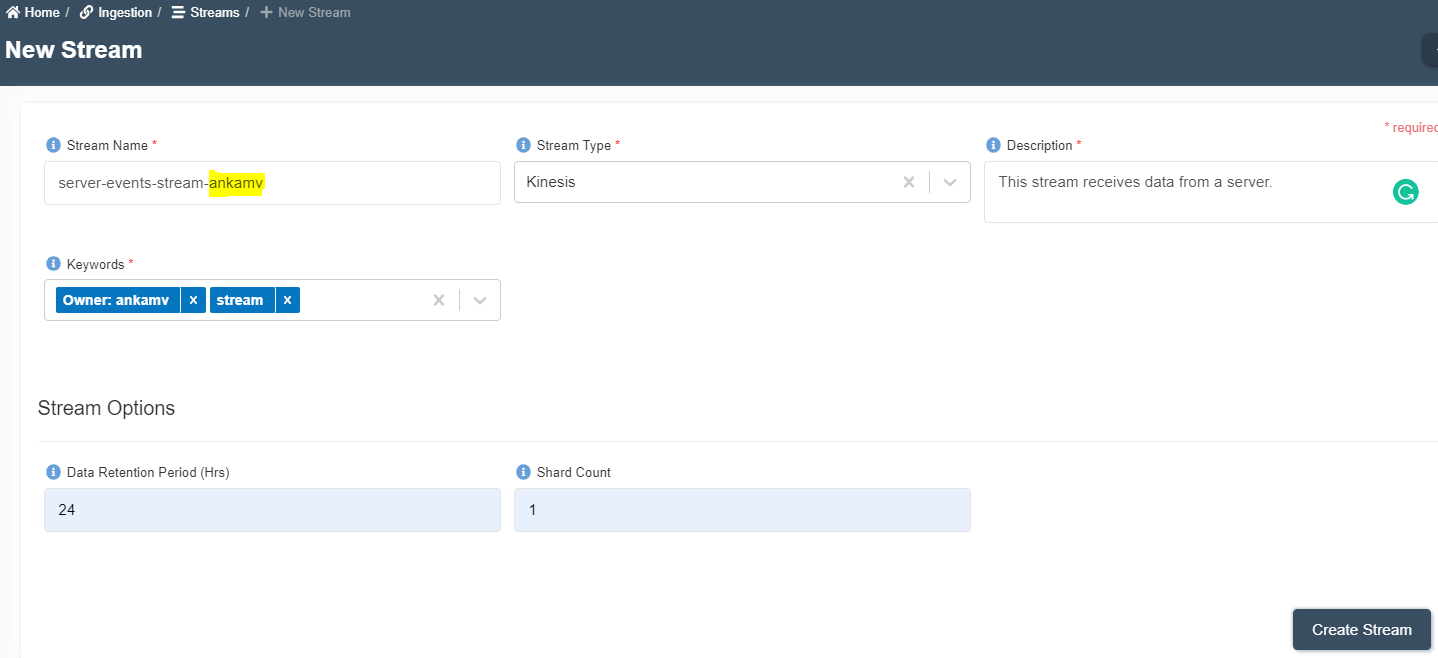
- Enter the following details and click on create connection.
Stream Name: server-events-stream-<your-userid>
Stream Type: Kinesis
Description: This stream receives data from a server.
Keywords: Stream
Data Retention Period (Hrs): 24
Shard Count: 1  (One shard provides a capacity of 1MB/sec data input and 2MB/sec data output.)
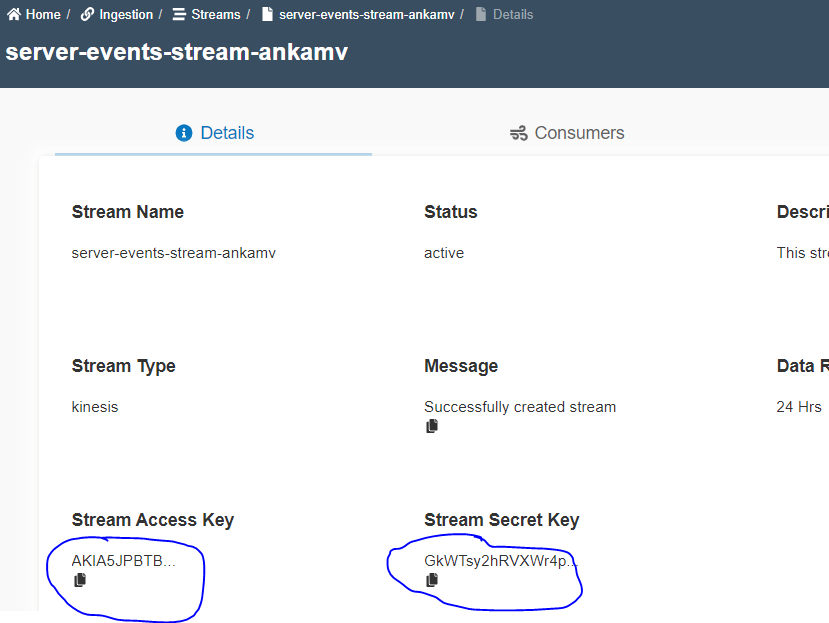
- Check the status on details page. Click on 🔄 to refresh the status. Status will change from
creatingtoactive. - Once the stream is created,
Stream Access KeyandStream Secret Keyare available as shown below.
Create a consumer
- Click on
Consumerstab. - Click on a ➕ icon at the top right corner.
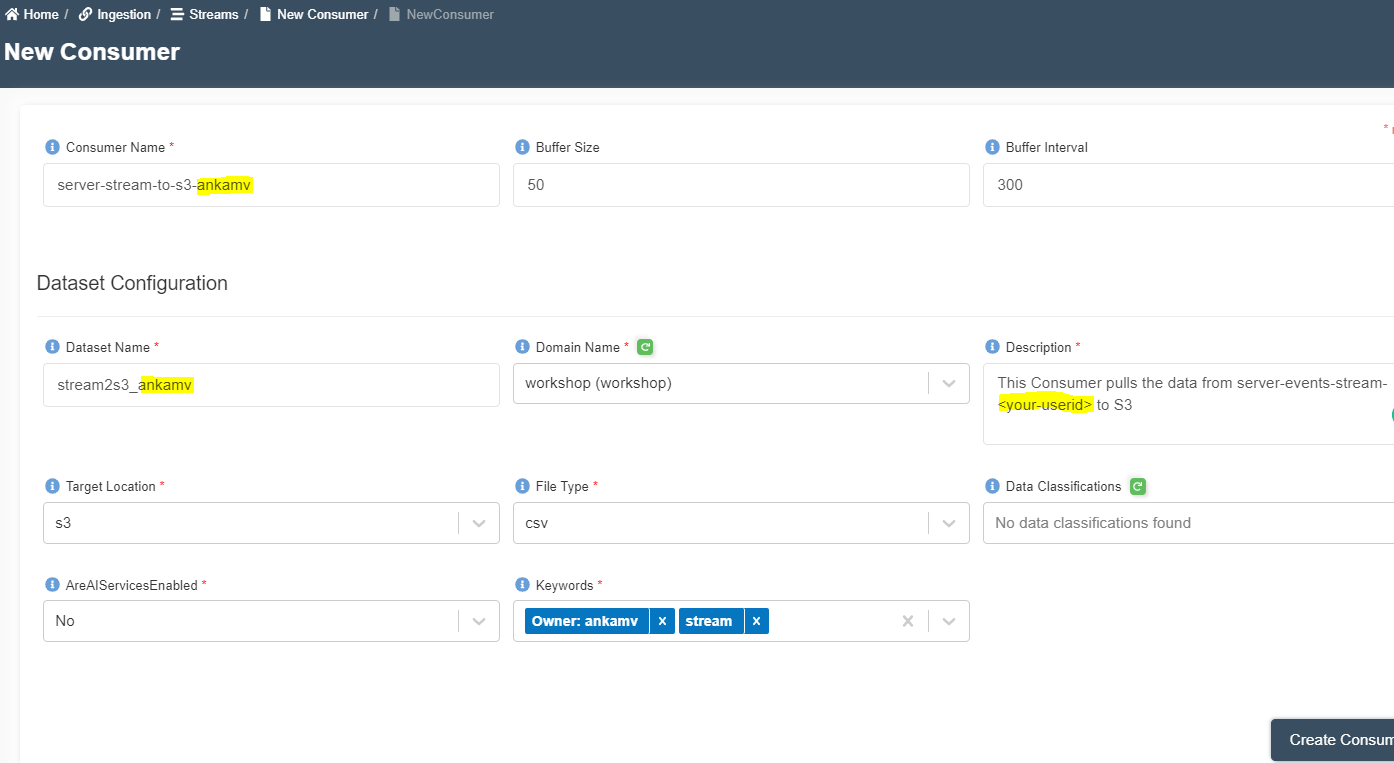
- Enter the following details and click on create consumer.
Consumer Name: server-stream-to-s3-<your_userid>
Buffer Size: 50
Buffer Interval: 300
Dataset Name: stream2s3_<your_userid>
Domain Name: workshop
Description: This Consumer pulls the data from server-events-stream-<your-userid> to S3
Target Location: S3
File Type: csv
Data Classifications: None
AreAIServicesEnabled: No
Keywords: stream
- Once the stream is created, it looks like the following picture in the
Consumerstab.
- Click on the
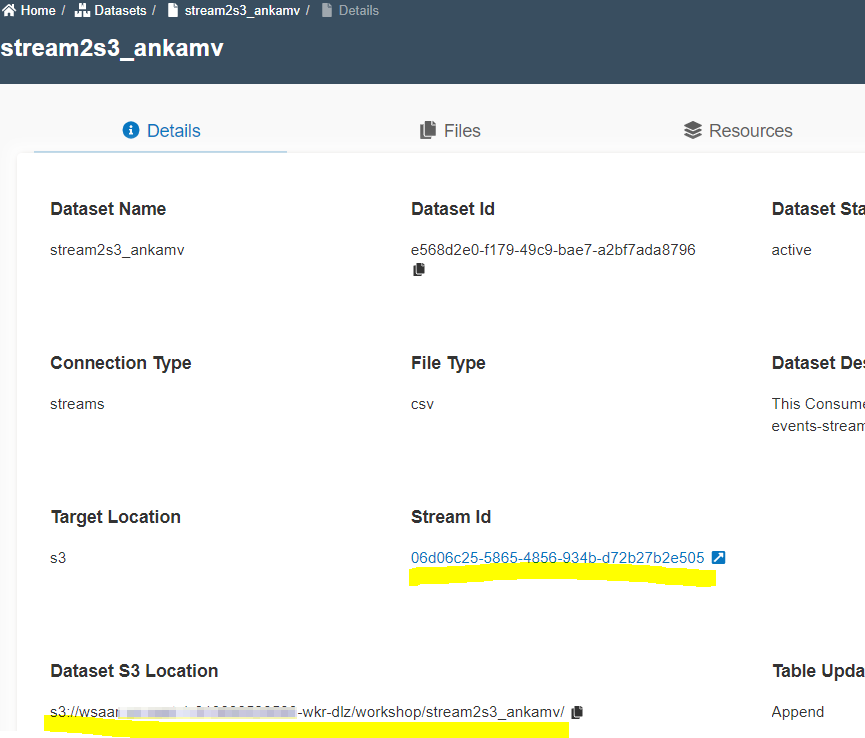
Datasetid link to go to the dataset created. - Notice the
Dataset S3 location. It has a link toStream IDas well.
Create a remote server
💡 If you already have a server, jump to configure agent. 💡
- Let's create an EC2 instance in your AWS account.
- Login to AWS Account to go to EC2 Service.
- Click on instances --> Launch instances.
- Select the Amazon Linux AMI with ID ami-0d5eff06f840b45e9.
- Select t2.medium or a better instance.
- Select a security group that allows port number 22 (SSH) from your machine.
- Select an existing key pair(pem file) or create a new one.
- Once the server is running, SSH to it using the pem file.
Configure a Kinesis agent
Run the following commands on EC2 instance.
sudo yum install python-pip -y
sudo yum install aws-kinesis-agent -y
sudo python3 -m pip install pandas
sudo mkdir /ingest_data
sudo chown ec2-user:ec2-user /ingest_data
- Edit agent configuration
sudo vi /etc/aws-kinesis/agent.json - Copy paste following configuration after replacing
awsAccessKeyId,awsSecretAccessKey,kinesisStream. You can find these details from the stream you've created above.
{
  "cloudwatch.emitMetrics": true,
  "awsAccessKeyId": "Copy and paste your stream's Access Key Id",
  "awsSecretAccessKey": "Copy and paste your stream's Secret Access Key",
  "kinesis.endpoint": "kinesis.us-east-1.amazonaws.com",
  "flows": [
        {
        "filePattern": "/ingest_data/*.csv",
        "kinesisStream": "server-events-stream-<your-userid>"
        }
  ]
}
- Create a python program
- Use command
vi /ingest_data/duplicate_files.py. Copy and paste below lines.
#!/usr/bin/env python3
import datetime
import pandas as pd

def copy_csv(filename):
    df = pd.read_csv('/ingest_data/stream.csv',low_memory=False)
    df_out = df.sample(n = 5)
    df_out.to_csv('/ingest_data/'+datetime.datetime.now().strftime("%Y%m%d-%H%M%S") +'_streams.csv',mode = 'w', index=False, header=False)

copy_csv('file.csv')
- Create a schedule to run program every minute.
- Run command
crontab -e. Copy and paste below line.
*/1 * * * * /usr/bin/python3 /ingest_data/duplicate_files.py
Run agent and monitor status
- Run the following commands to start the agent.
sudo service aws-kinesis-agent start
sudo chkconfig aws-kinesis-agent on
- Run this command locally to copy any CSV file to the server location.
scp -i your-pem-file.pem stream.csv ec2-user@your-server-ip-address:/ingest_data/stream.csv
- Kinesis producer agent status can be watched running the following command on the server.
tail -f /var/log/aws-kinesis-agent/aws-kinesis-agent.log
Check output
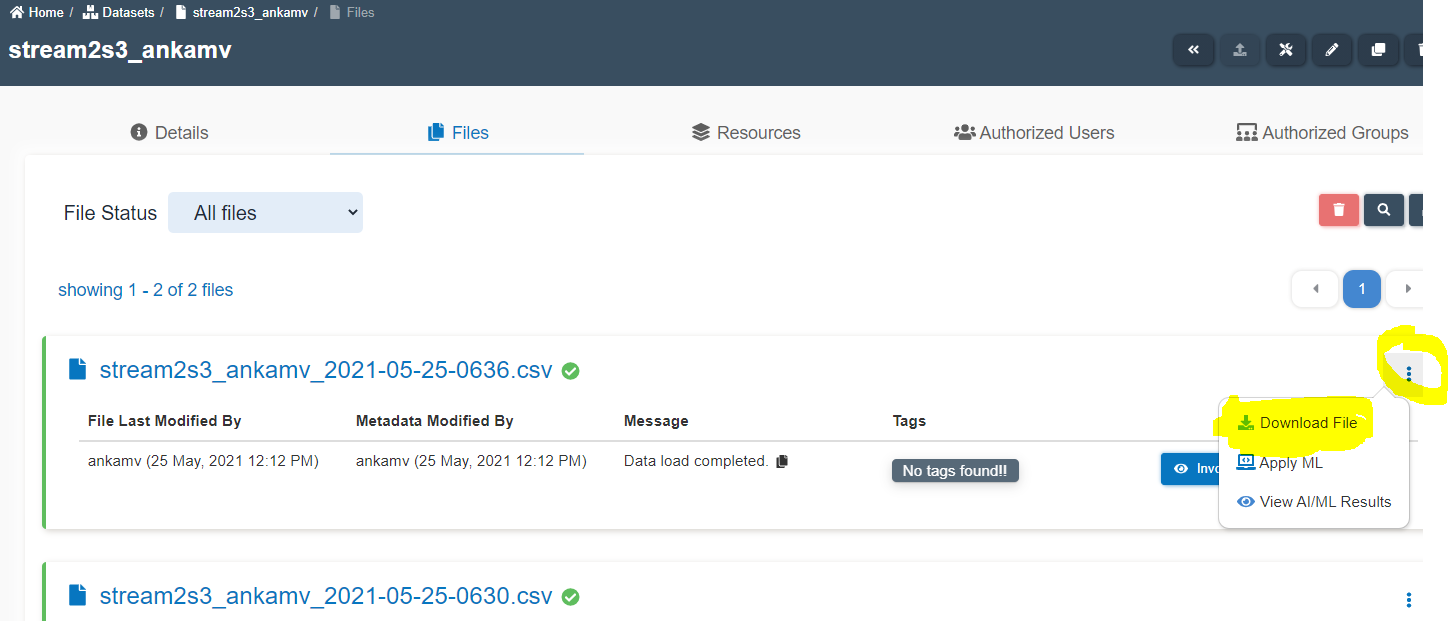
- Go to the Amorphic Dataset. Use the navigator to quickly go to the Dataset page. Press
ctrltwo times successively and type the dataset namestream2s3_<your_userid> - Click on the
filestab. - Click on
three dots⋮ in front of the file to download it as shown below.
- Verify the number of records in each file and frequency of file loading on S3.
Congratulations!!!
- You've successfully created a kinesis stream, a consumer and a producer to write streaming data to a dataset.
- What's next?
- You can analyze the data in near real-time using a glue job or run ML to predict something.

