Setup forecasting job
info
- Follow the steps mentioned below.
- Total time taken for this task: 2 hours .
- Pre-requisites: Create Forecast Output Dataset
Setup a forecasting job
- Click on 'MACHINE LEARNING' --> 'Forecast Jobs' from left navigation-bar.
- Click on ➕ icon at the top right corner to create a new forecast job.
- Enter the following information and click submit.
Forecast Job Name: retail_sales_forecast_<your_userid>
Forecast Job Type: RETAIL
Description: Forecast sales per store per item
Keywords: Retail
Add Datasets
- Click on 'View Details' of the forecast job that you've just created.
- Click on 'Datasets' tab.
- Click on ➕ icon at the top right corner to add a dataset.
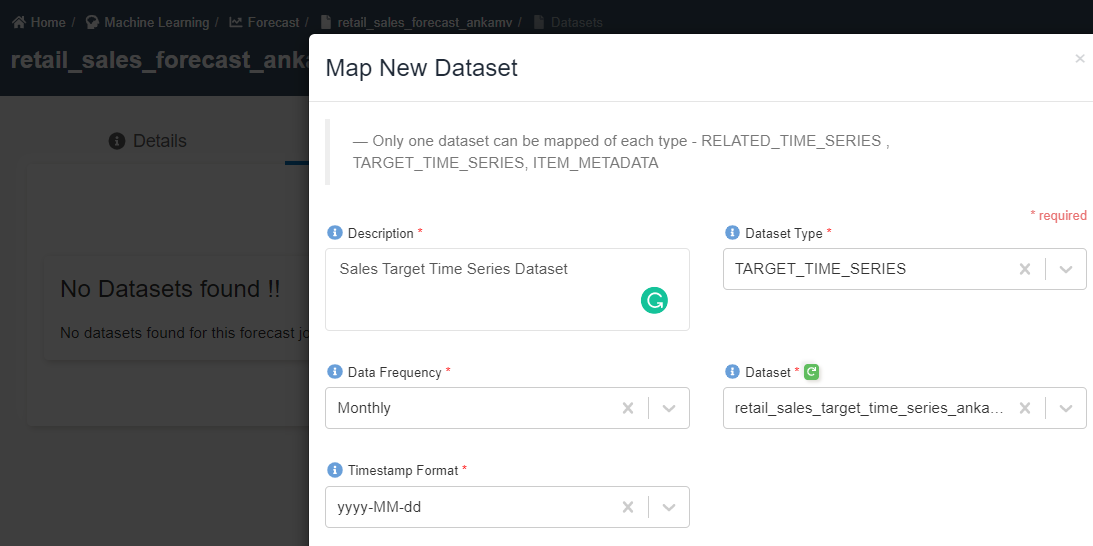
- Enter the following information and click on submit.
Description: Sales Target Time Series Dataset
Dataset Type: TARGET_TIME_SERIES
Data Frequency: Monthly
Dataset: retail_sales_target_time_series_<your_userid>
Timestamp Format: yyyy-MM-dd
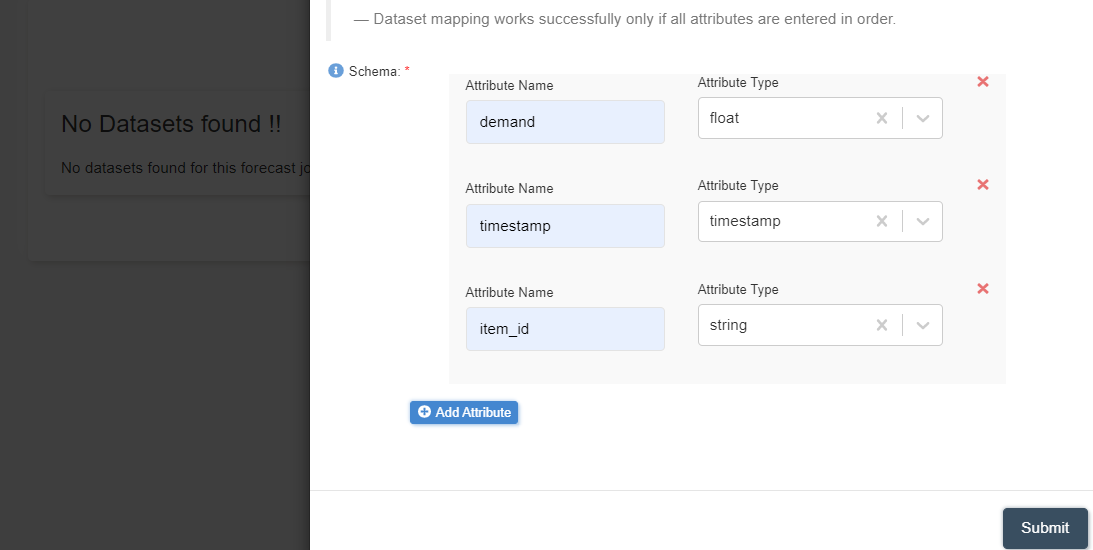
Schema:
       demand: float
       timestamp: timestamp
       item_id: string
 ⚠️ Double check the data types before submitting ⚠️
- Click on ➕ icon at the top right corner to add another dataset.
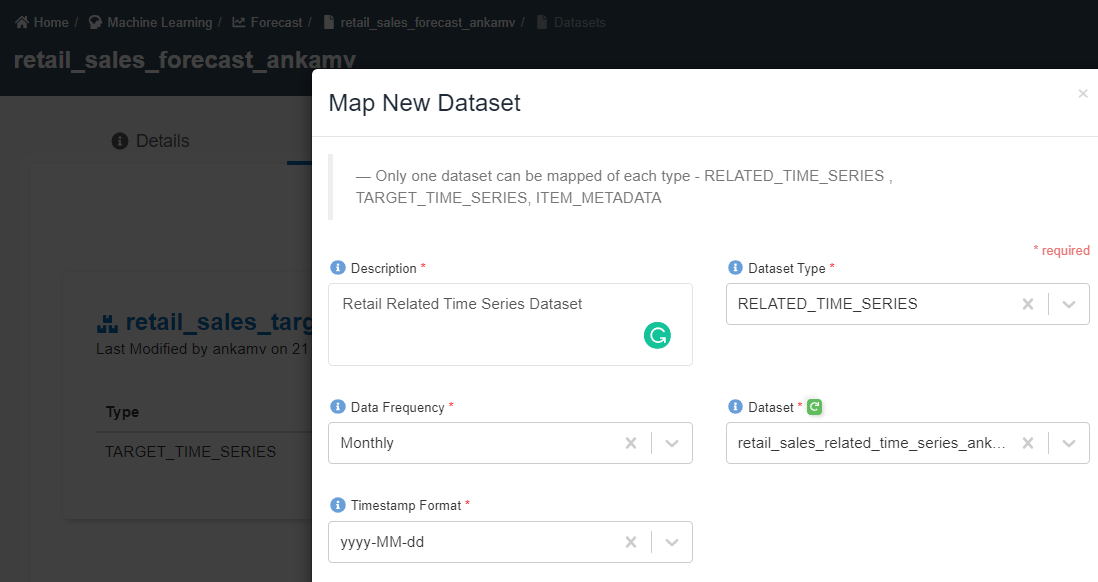
- Enter the following information and click on submit.
Description: Sales Related Time Series Dataset
Dataset Type: RELATED_TIME_SERIES
Data Frequency: Monthly
Dataset: retail_sales_related_time_series_<your_userid>
Timestamp Format: yyyy-MM-dd
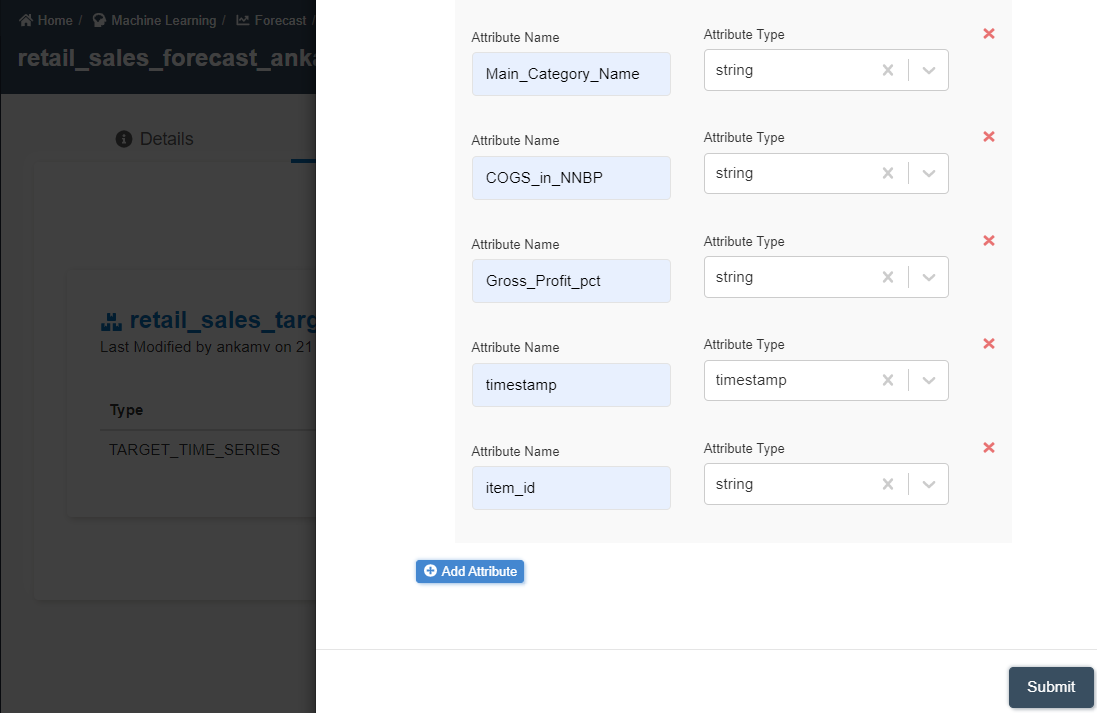
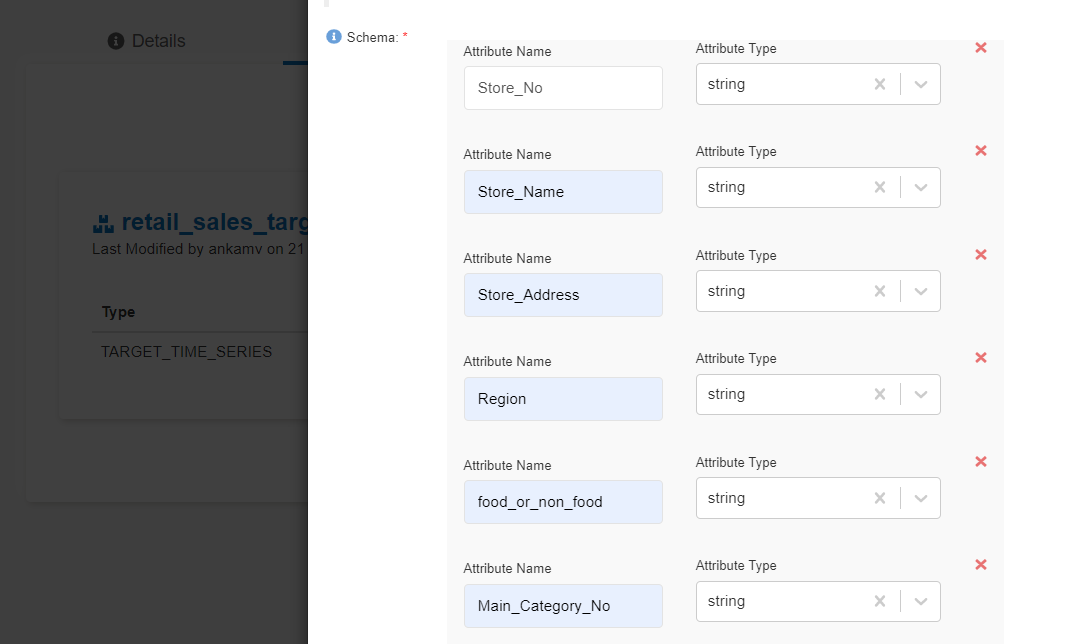
Schema:
        Store_No: string
        Store_Name: string
        Store_Address: string
        Region: string
        food_or_non_food: string
        Main_Category_No: string
        Main_Category_Name: string
        COGS_in_NNBP: string
        Gross_Profit_pct: string
        timestamp: timestamp
        item_id: string

 ⚠️ All variables must be of "string" type except "timestamp" ⚠️
- Wait for status of datasets to turn from 🟠 to ✔️
- Click 🔄 to refresh the status.
Create a predictor and version
- Click on 'Predictors' tab.
- Click on ➕ icon at the top right corner to create a new predictor.
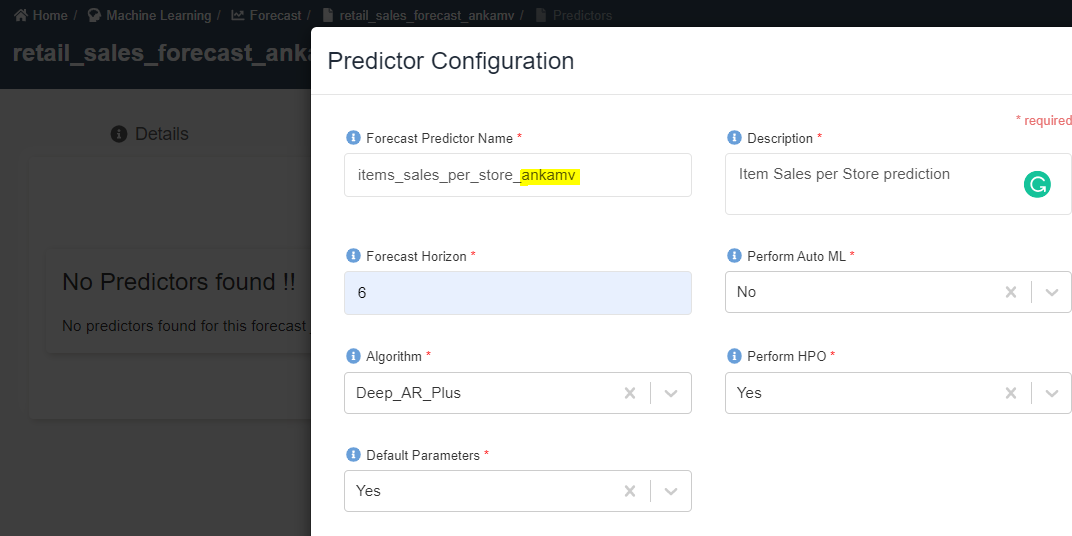
- Enter the following information and click submit.
Forecast Predictor Name: items_sales_per_store_<your_userid>
Description:  Item Sales per store prediction
Forecast Horizon: 6
Perform Auto ML: No
Algorithm: Deep_AR_Plus
Perform HPO: Yes
Default Parameters: Yes
Forecast Frequency: Monthly
- Click on ➕ icon at the top right corner to create a new version.
- Enter the following information as shown in below and click on 'Create Version'.

- Wait for status of datasets to turn from 🟠 to ✔️
- Click 🔄 to refresh the status.
Create an Inference
- Click on 'Inferences' tab.
- Click on ➕ icon at the top right corner to create a new inference.
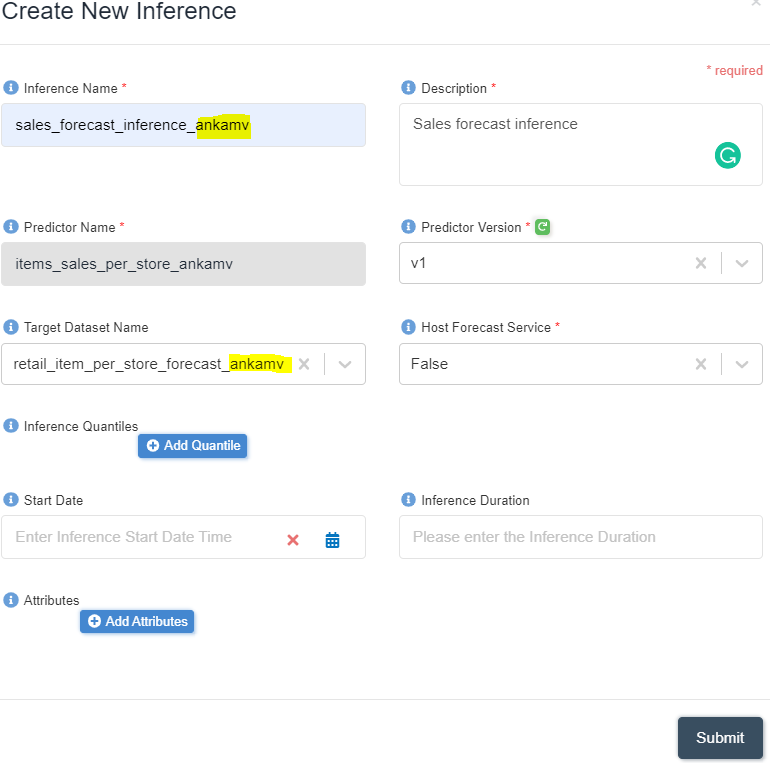
- Enter the following information and click submit.
Inference Name: sales_forecast_inference_<your_userid>
Description: Sales forecast inference
Predictor Name: items_sales_per_store_<your_userid>    <-- This is populated automatically
Predictor Version: V1
Target Dataset Name: retail_item_per_store_forecast_<your_userid> <-- This is the predictior output dataset created earlier
Host Forecast Service: False
Leave all other fields untouched.
- Wait for status of datasets to turn from 🟠 to ✔️
- Click 🔄 to refresh the status.
Check Output
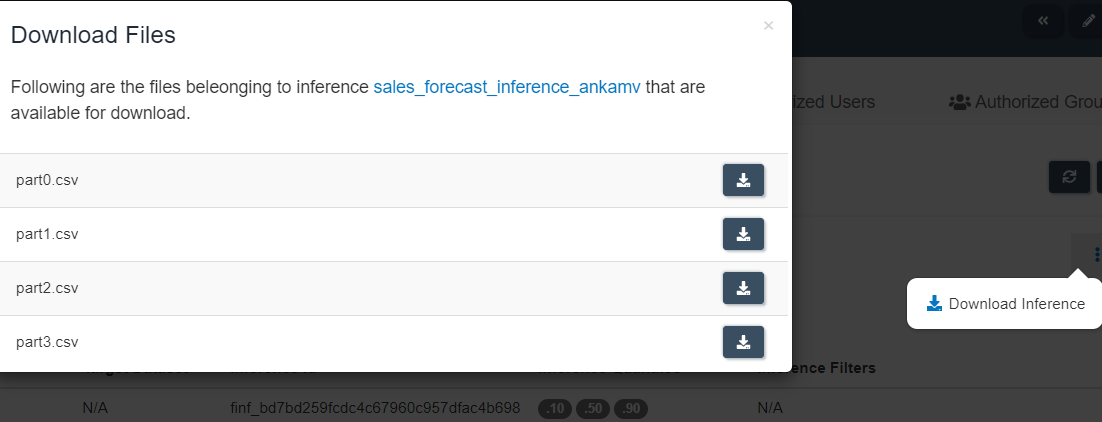
Once the job is successful, Click on "three dots" in front of inference. Click on "Download Inference".
Download a sample file to verify the output.
Go to output dataset -->
items_sales_per_store_<your_userid>Check the status of files turning from 🟠 to ✔️
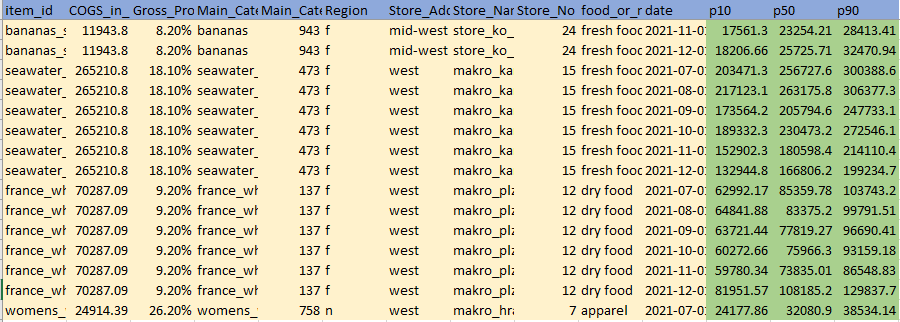
We have three predictions in the output representing varying confidence levels - P10, P50 & P90. A sample output is as follows.
Congratulations!!!
You've learned how to forecast on Amorphic. Now, proceed to 'Creating a dashboard' task.

