Ingest data from external sources into Amorphic
info
- Prerequisite: Setup Amorphic and login.
Tidbits
- Add your ⚠️userid⚠️ as a suffix to all the resources that you create.
- This will avoid contention with other users as Amorphic maintains a global metadata catalog. 💡
- This is mandatory as multiple users are following these workshop instructions.
- Userid
adc00is used to create this workshop examples. Replaceadc00withyour_userid
Create a connection
- Click on 'Connections' widget on the home screen or click on
INGESTION-->Connectionson the left side navigation-bar or you may also click onNavigatoron top right corner and search forConnections. - Click on a ➕ icon at the top right corner.
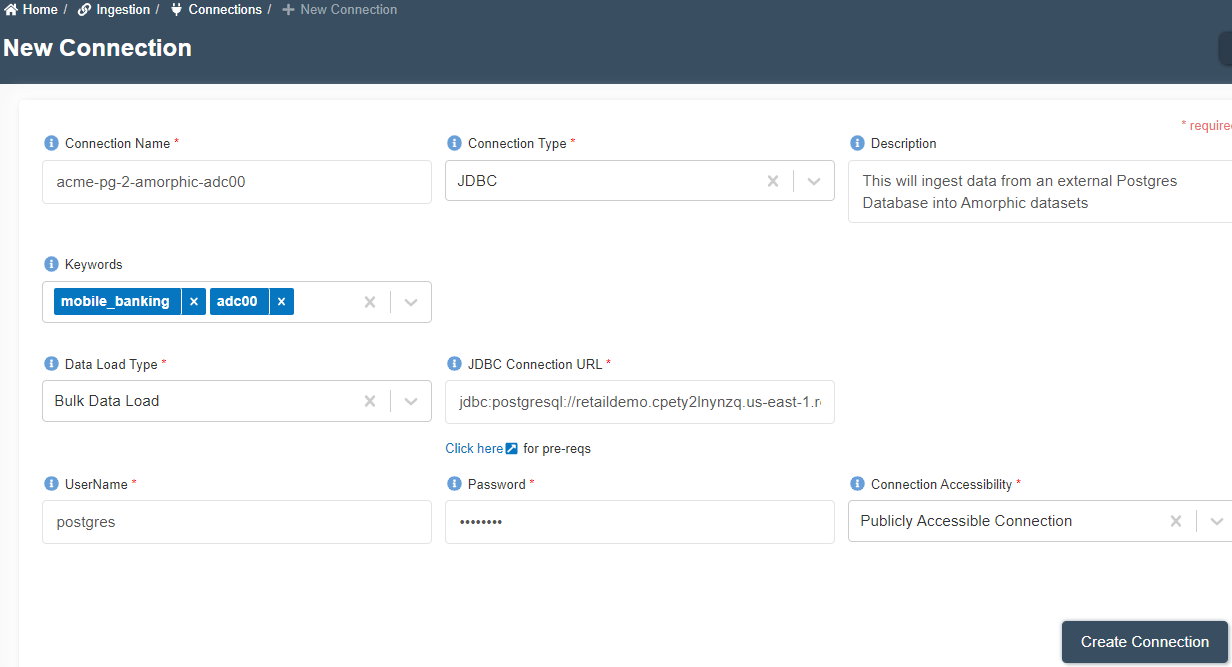
- Enter the following details and click on create connection.
{
  "Connection Name": "acme-pg-2-amorphic-<your-userid>"
  "Connection Type":  "JDBC"
  "Description": "This connection migrates data from Postgres DB to Amorphic"
  "Keywords": "Add relevant keywords like 'mobile_banking'. This will be useful for search"
  "Data Load Type": "Bulk Data Load"
  "JDBC Connection URL":  "jdbc:postgresql://retaildemo.cpety2lnynzq.us-east-1.rds.amazonaws.com:5432/retail"
  "User Name": "postgres"
  "Password": "contact facilitator"
  "Connection Accessibility": "Publicly Accessible Connection"
}
Create Connection Screen Capture:
Test Connection
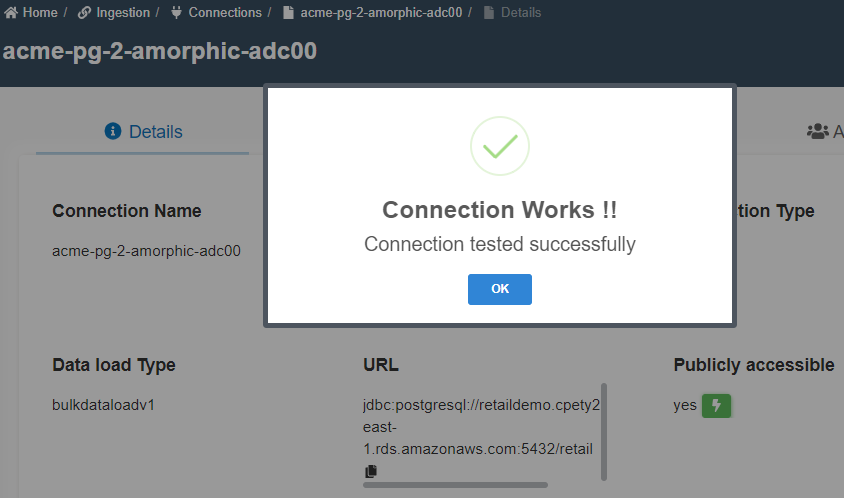
- On the newly created connection page, click on ⚡ icon in 'Publicly Accessible' section.
- It should show "Connection Works" as shown in below image. Click 'OK'.
- If the connection test fails, click on 'Edit Connection' at the top right corner to re-enter the details and click on 'Update'.
Create a Task
- Click on the 'Tasks' tab on the newly created connection. You will see 'No tasks found' or previously created tasks.
- Click on ➕ icon at the top right corner to create a new task.
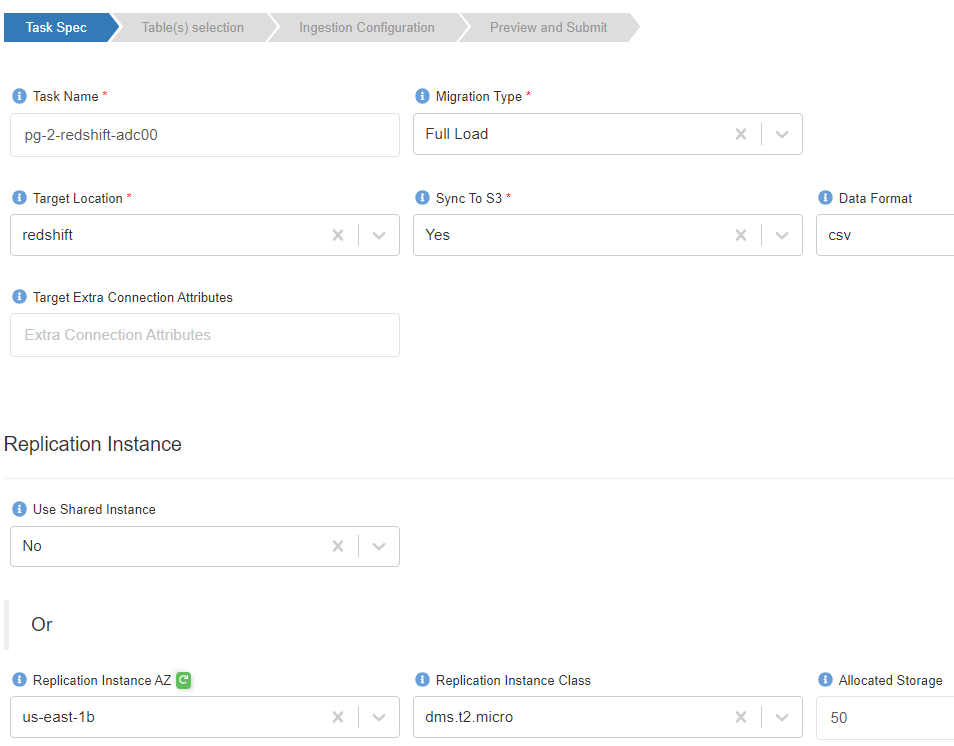
- Enter the following details and click Next.
{
  "Task Name": "pg-2-redshift-<your-userid>"
  "Migration Type": "Full load"
  "Target Location": "Redshift"     (S3 or S3Athena are ideal for ETL. But, let's use Redshift for this workshop)
  "Sync to S3": "Yes"
  "Data Format": "CSV"
  "Target Extra Connection Attributes":         <-- Leave it blank
  "Use Shared Instance": "No"
  "Replication Instance AZ": "us-east-1b" or "us-east-1c"
  "Replication Instance Class": "dms.t3.micro"
  "Allocated Storage": "50"
}
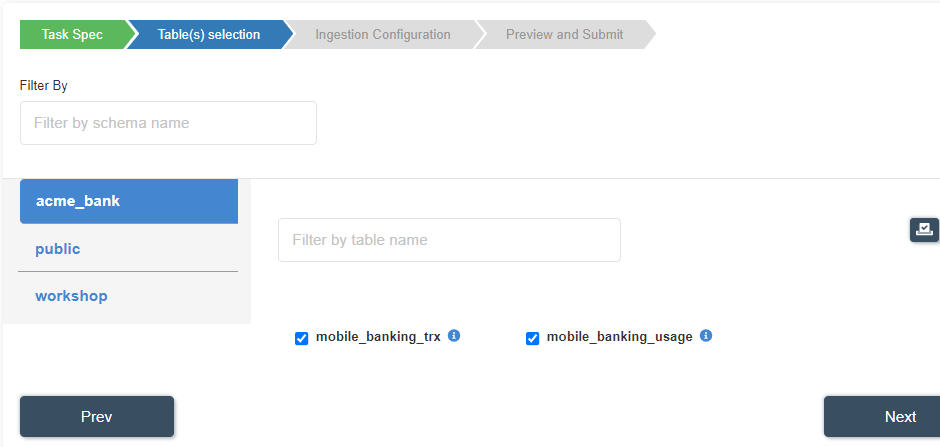
- Select
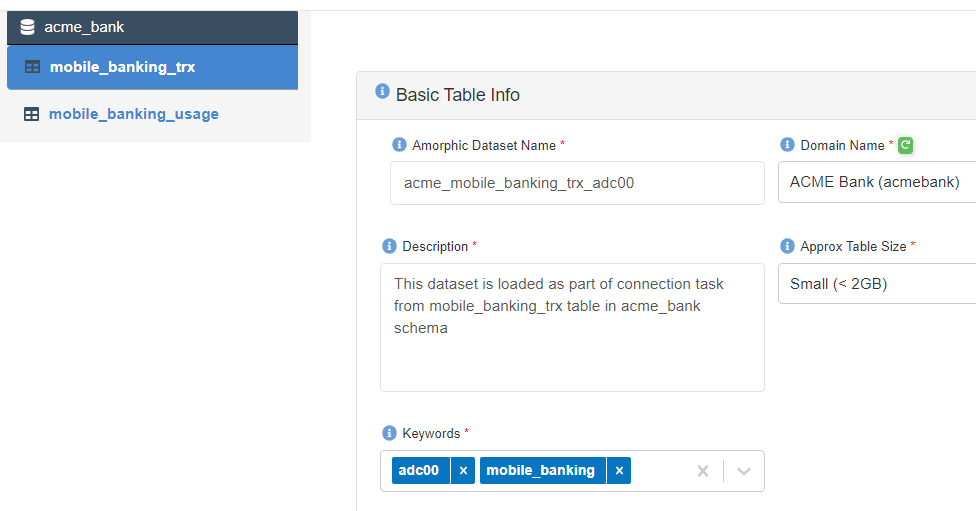
mobile_banking_trx,mobile_banking_usagetables fromacme_bankschema and click 'Next' as shown below.
- Change information as mentioned below for the two tables. Tables can be selected by clicking on the table name. You may also choose to bulk edit Dataset Name, Domain and Keywords.
{
  "Amorphic Dataset Name": "acme_mobile_banking_trx_<your-userid>'
  "Domain Name": "ACME Bank (acmebank)" ## This will be nothing but a schema in Redshift
  "Description": "Keep as it is"
  "Approx Table Size": "Small (< 2GB)""
  "Keywords": "Add 'mobile_banking'"

  "Amorphic Dataset Name": "acme_mobile_banking_usage_<your-userid>'
  "Domain Name": "ACME Bank (acmebank)" ## This will be nothing but a schema in Redshift
  "Description": "Keep as it is"
  "Approx Table Size": "Small (< 2GB)""
  "Keywords": "Add 'mobile_banking'"
}
- ⚠️ Click 'Next' only after changing the above information for both tables as shown below.⚠️
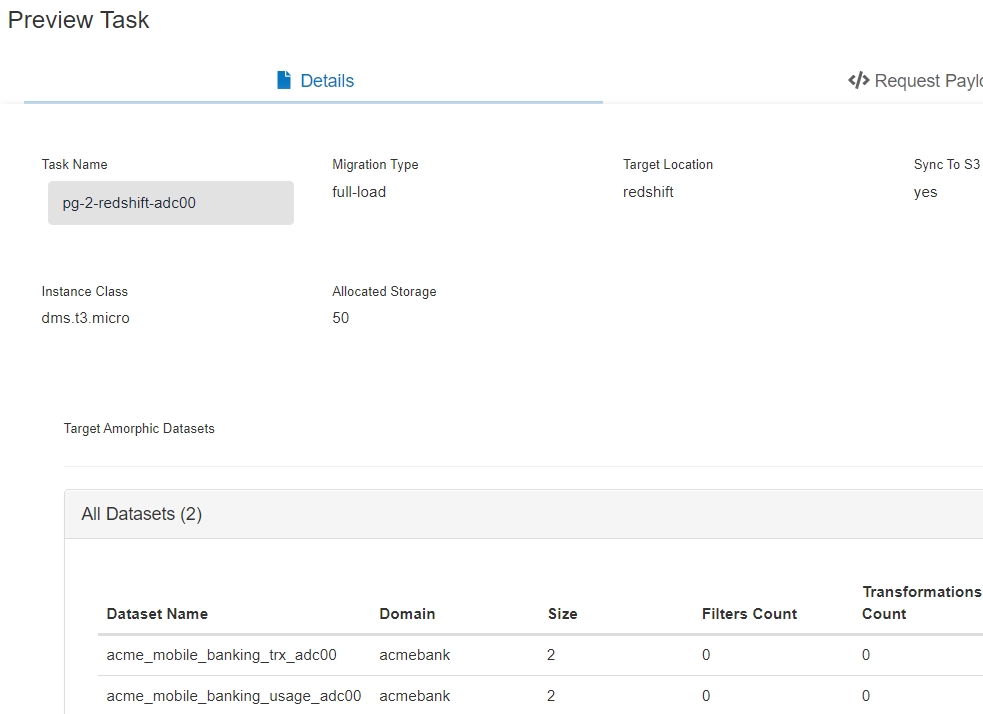
- In the last step, verify the details, dataset names, domain names and click on 'Submit Task' as shown below.
You will see a message like this -->
Once the Datasets are registered successfully, you will see a Ready status and a ▶️ button as shown below. If you don't see ready status, click ↩️ icon in front of 'Message'.
- Click on ▶️ button and you will get a message 'Start Task'. Click 'Yes, Start Task' as shown below.
- Refresh the task status by clicking ↩️ icon in front of 'Message'.
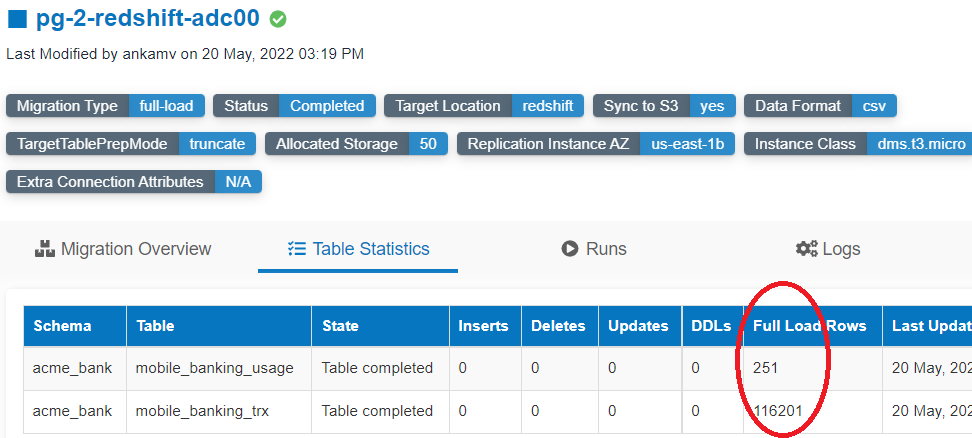
- Once the task status is 'Completed', Click on 👁 'View' icon to check the statistics.
- Click on 'Table Statistics' tab. You will see the stats similar to the below image.
- Now, click on 'DATASETS' --> 'Datasets' from left navigation-bar.
- You will be able to see the datasets created as part of the task. You may use Navigator at top right corner to search and find newly created datasets. You may also directly go to the dataset page by clicking the dataset link on migration overview tab of task.
- Click on 'View Details' of
mobile_banking_trx_<your_userid>dataset widget. - Click on 'Files' tab.
- You will see two CSV files created as part of the migration task.
Congratulations!!!
You have learned how to migrate multiple tables to Amorphic. Now, proceed to 'ETL' task.

